tutorial: Uploading Images
Dreamwidth has storage on each account for up to 500mb of images. It's best to upload JPGs rather than PNGs if you want to maximize your space, as the file size is smaller. However, for RP purposes this is usually plenty of space.
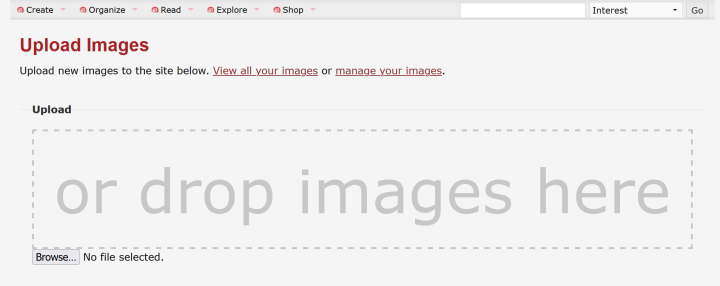
To access the upload dialog, visit the Create menu and select Upload Images.


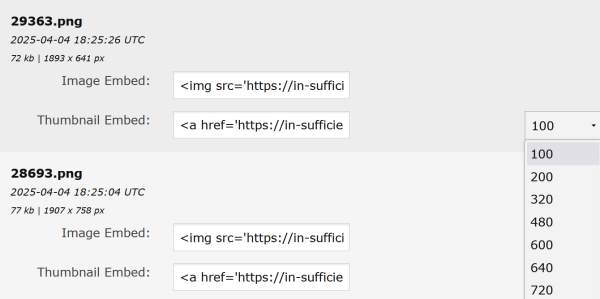
<a href='https://in-sufficientdata.dreamwidth.org/file/29363.png'><img src='https://in-sufficientdata.dreamwidth.org/file/100x100/29363.png' /></a>
By default, this code will link to the image, then insert a 100x100 thumbnail. So what you see here is a tag that links to the original image address (https://in-sufficientdata.dreamwidth.org/file/29363.png), then has the address to the thumbnail. You can manually replace this code for thumbnails in the following sizes: 100, 200, 320, 480, 600, 640, 720, 768, 800, 1024, 1200, 1280, and 1600. For the most part 720 or smaller is best.
If you wanted this file inserted without using a thumbnail, you would use this code:
<img src='https://in-sufficientdata.dreamwidth.org/file/29363.png'>
At the top of this page are links to View all your images or manage your images. The manage your images page is used to add titles, alt text, and delete images. At the view your images page, you can insert the thumbnails of different sizes without having to type the numbers into the thumbnail code yourself. Simply select the size you want from the size selection dialog next to the thumbnail link box, and then copy the resulting link.

